Signing PowerShell scripts
In this post i will tell you why It’s important to sign your skripts.
If we look at a clean installed pc, PowerShell scripts can’t run by default. This is blocked by Microsoft due to security reasons. If you download a PowerShell skript from the internet and try to run it, It won’t work. Even If you unblock the skript, It won’t work. So there are two possibilities to run scripts:
- Sign scripts
- Change the ExecutionPolicy (only for testing purposes)
So what is that ExecutionPolicy?
This is a method to prevent you from running malicious code from the internet or from an untrusted source.
You can set the following execution policies:
- RemoteSigned: Run scripts that has created locally. Scripts from UNC-paths or the internet has been singed by a trusted publisher
- Unrestricted: You can run every script from every source. No signing required
- AllSigned: Every script that runs needs to be singed by a trusted publisher.
- Restricted: No script can be executed on that system.
You can get all ExecutionPolicies for all scopes by running the following command:
1
Get-ExecutionPolicy -List | Format-Table -AutoSize
You will get a table with Scopes and the current ExecutionPolicy.
| Scope | ExecutionPolicy |
|---|---|
| MachinePolicy | Undefined |
| UserPolicy | Undefined |
| Process | Undefined |
| CurrentUser | Undefined |
| LocalMachine | Undefined |
Explanation of the Scopes:
- Machine Policy: This can be set by Group Policy and applies to all users (Computer Configuration -> Administrative Templates -> Windows Components -> Windows PowerShell -> Turn On Script Execution)
- User Policy: This can be set by Group Policy and applies to the current user (User Configuration -> Administrative Templates -> Windows Components -> Windows PowerShell -> Turn On Script Execution)
- Process: The execution eolicy for the current PowerShell session.
- CurrentUser: The execution policy for the current user.
- LocalMachine: The execution policy for all users.
The default scope is LocalMachine. If you set the execution policy with the following command:
1
Set-ExecutionPolicy -ExecutionPolicy Restricted
So let’s get into code signing:
there are two methods for signing code:
- with a certificate from a PKI.
- with a self singed certificate.
I won’t cover the self singed certificate part, because if you are in a production environment It’s not recommended.
for the PKI scenario you need to have a PKI installed into your environment and you need a code signing certificate.
If you don’t have that I will show you how to intall it via PowerShell.
- Install the Certificate Authority:
1
Install-AdcsCertificationAuthority -CAType EnterpriseRootCa -CryptoProviderName "RSA#Microsoft Software Key Storage Provider" -KeyLength 2048 -HashAlgorithmName SHA1 -ValidityPeriod Years -ValidityPeriodUnits 3
- Add the codesinging Template to the CA:
1
Add-CATemplate -Name 'Code Signing'
- Make the certificate availible in the Domain through Group policy:
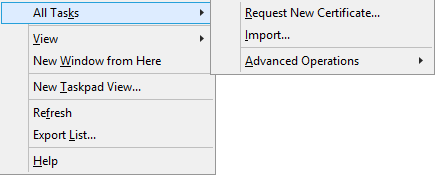
First you have to issue a certificate. Open a mmc and add the certificates-snap-in. Go to Personal -> Certificates. Right-Click all Tasks an Click “Request new certificate”.
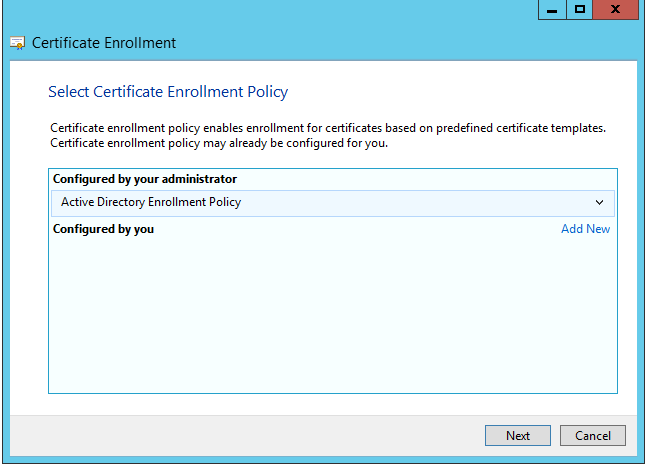
Click next in the first dialog box. In the window “Select Certificate Enrollment Policy” click next
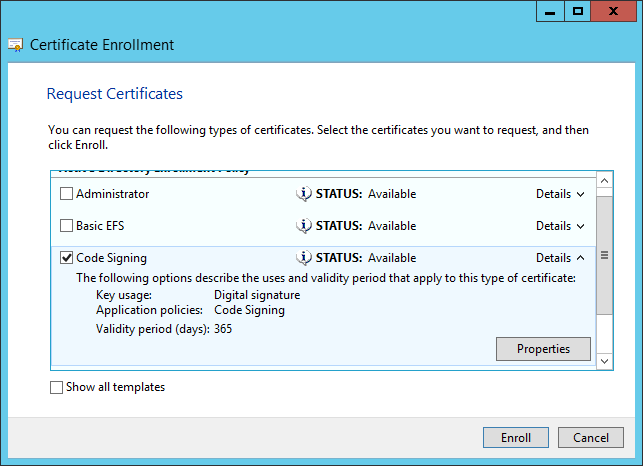
Select the “Code Signing” – template. Click on details and select “Properties”
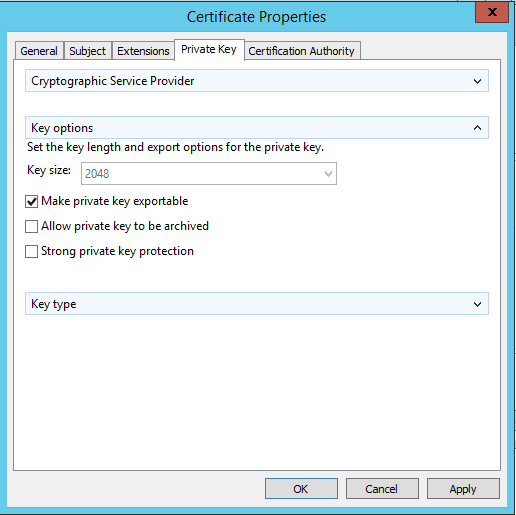
In the properties window go to the “Private Key” – tab and expand the section Key options. Check “Make private key exportable”
Select the OK-button and click “Enroll”.
Now we have to export the certificate. Right-click on the certificate -> All Tasks -> Export.
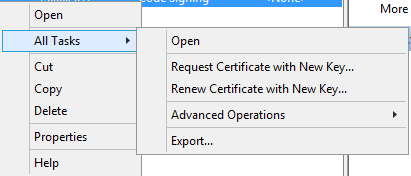
Click next on all screens and save the certificate on the harddrive.
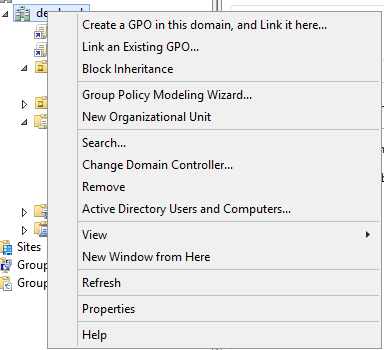
Now we need to create a Group Policy. Open the Group Policy Management and add a new Group Policy. In my case i will create it on the root level of the domain. Right-click your domain name and click “Create a GPO in this domain, and Link it here”
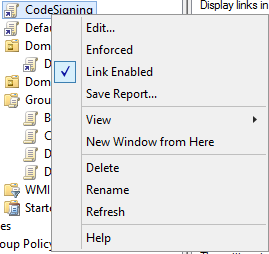
Give the Group policy a name. Right-click the policy and click edit
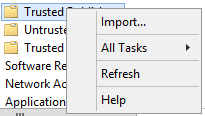
Expand “Computer Configuration -> Policies -> Windows Settings -> Security Settings -> Public Key Policies -> Trusted Publishers” right-click “Import”
Select the path to the certificate that you saved on the harddrive and click next on all screens. If the process is complete you can check if it was successful by clicking “Trusted Publishers”. You now should see the certificate.

So the next time the clients update the policy it is placed into the “Trusted Publishers” store.
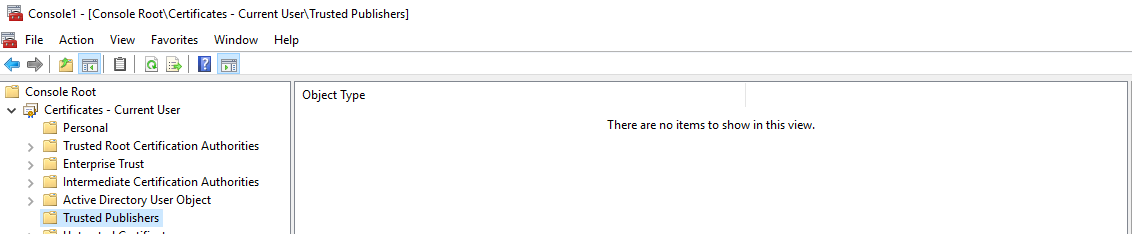
To proof that, let’s look at a client before the group policy update.
Now let’s make a group policy update by opening a PowerShell console and type in
1
gpupdate /force
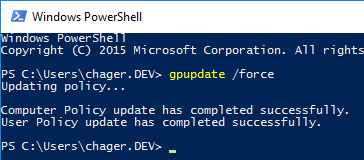
If I now refresh my “Trusted Publishers” – certificate store I will find the new certificate.

If you now want to sign a script on another computer, you also need the code signing certificate that we created earlier and import it into your “Personal” store.
If you want to sign a script with that certificate use the following code:
1
2
3
4
5
# Get the codesigning cert
$cert=(Get-ChildItem cert:currentuser\my\ -CodeSigningCert)

# Sign the script
Set-AuthenticodeSignature -Certificate $cert -FilePath [PATH TO SCRIPT]
If you now copy the script to another server and run it should work.