Converting XenServer VMs to Hyper-V Gen 2 Events
Today I’m going to show how to migrate your XenServer VMs to Hyper-V Gen2 Vms using the following tools:
- XenCenter
- XenConvert 2.3.1: XenConvert 2.3.1
- PowerShell Skript to convert a Gen1 Hyper-V VM to a Gen 2 Hyper-V VM: PowerShell Skript
First boot your XenServer and access the VM that you want to migrate with it.
Uninstall everything that begins with Citrix Xen from Programs and Features. Restart the machine.
If you have any DVD Images attached to the machine empty the drive and shutdown the machine.
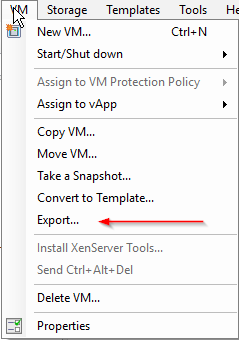
In CenXenter select the VM and in the Menu click VM -> Export
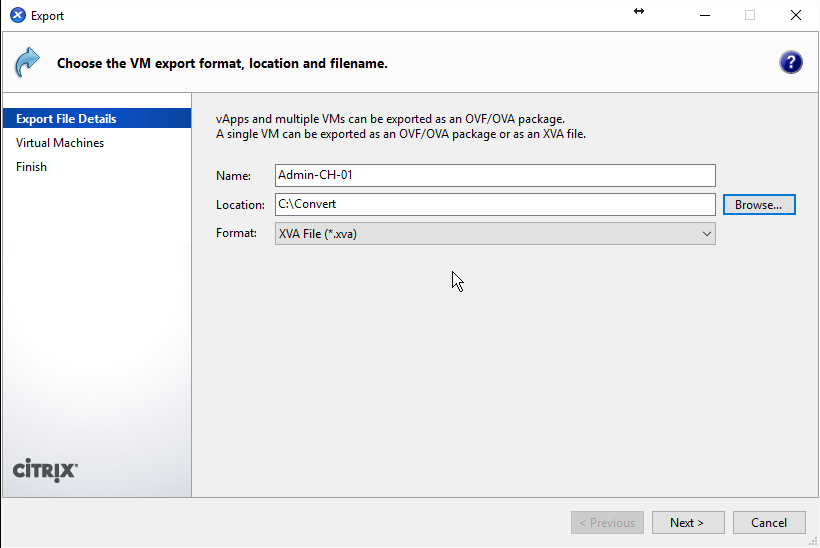
In the next screen type in a name and select the location. The format should be changed from .ovf to .xva. The result should look like this:
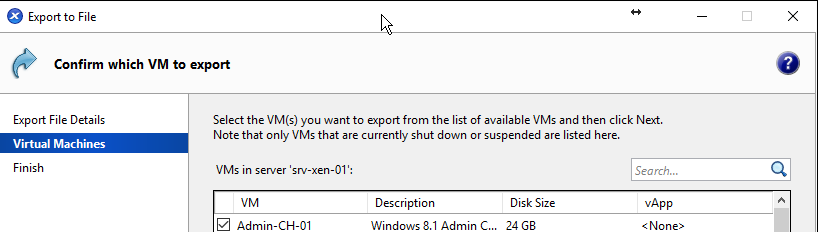
Click Next. Make Shure your VM that you selected in the first place is selected:
Click Next and Finish. Wait for the process to finish. You can monitor the status in Notifications -> Events.
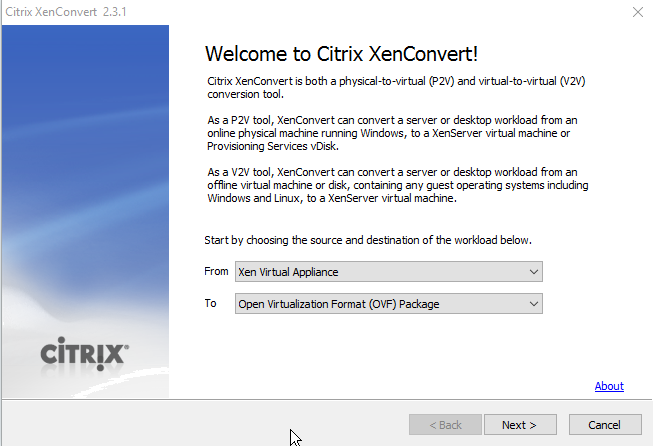
After the export is finished start Citrix XenConvert 2.3.1 and select From: Xen Virtual Appliance To: Open Virtualization Format (OVF) Package
Click Next. Choose the Location where you exported you VM before. Click Next.
Leave the settings as they are and click Next. You can give the VM a new name if you want and click Next. Click Convert. The Conversion Progress should start.
Note: If your Xen Virtual Applicance is on a network Share be sure to convert to the local machine. If you don’t do it the conversion process will fail.
Click Finish.
If you look in your conversion folder now you should see something like this:

Rename the vhd-File to the PC-Name and copy it to your Hyper-V vhd store. You can delete the other files.
Open the Hyper-V manger and create a new virtual machine.
Give the VM a name. You can use the name the you had before. Click Next. Select Generation 1 and click next. Select some RAM click Next. Select the apropriate Network Adapter and click Next. Choose “Use an existing virtual harddrive” and navigate to the location of the vhd-file. Click Next. Click Finish. The VM is now created.
If you don’t want to upgrade the VM to Generation 2 you can skip the rest.
Start the VM. Hyper-V will install the integration services automatically and install the devices.
To convert the VM correctly to a Generation 2 VM the WinRE (Windows Recovery Environment) has to be disabled. To disable the WinRE use the following command in command prompt or PowerShell as an Administrator:
1
reagentc /disable
If everything is working correctly you will see something like this:

Shutdown the VM.
Now use the script that we downloaded earlier.
Before you run it, be shure to unblock the script. You can do this by right klicking the PowerShell-File and select properties. Click the button “Unblock” and click ok. Run PowerShell as Administrator
The following command will convert the VM with the name TestVM to a Generation 2 VM:
1
.\Convert-VmGeneration.ps1 -VmName "TestVM" -NoPSVersionCheck
After everything is finished you should see a second VM with VM Name (2. Gerneration) in the Hyper-V Manager. You can now delete the old VM and rename the files and the name of the new VM.